Introduction
In this post, I will show you how to create a two-tier architecture to deploy a WordPress application with a MariaDB database using CloudFormation. A two-tier architecture is an application architecture that consists of two main components or tiers; a web tier and a database tier. The web tier hosts the user facing application or UI and the data tier is responsible for storing the data used by the application. I recently learned CloudFormation so, I naturally decided to use it to set up a common infrastructure architecture using some of the core AWS services such as EC2 and VPC and blog about it. CloudFormation is an Infrastructure as Code (IaC) service offered by AWS that lets you define and provision infrastructure using YAML or JSON templates. You can use CloudFormation to create virtually any resource on AWS such as networks, security groups, EC2 instances, databases, load balancers, VPCs, and more.
In this post we’ll build the architecture in the image below. We’ll create a VPC with internet access through an Internet Gateway. The VPC will be divided into a public and private subnet, The two subnets will have different security groups associated with them to control their network traffic. Each subnet will have an EC2 instance running in it. The EC2 instance In the public subnet will run WordPress and one in the private subnet will be our database server. In addition to the Internet Gateway, we’ll add a NAT Gateway to allow the database instance to access the internet.

To get started, we’ll first create a YAML template to record our configuration. CloudFormation templates can be written in JSON or YAML, but I prefer YAML so all the examples in this post will be in YAML. Templates allow you to describe declaratively, the set of resources and configurations you want. AWS refers to these resources as a stack. Deleting a stack deletes every single artifact created by CloudFormation which makes spinning infrastructure up and down easy. Let’s create the template.
Parameters
We’ll start by defining parameters for the VPC and Database Server. In the code snippet below, we create a VPC with a CIDR of 10.0.3.64/26. In it, we’ll create two subnets of equal size; 10.0.3.64/27 for the public subnet and 10.0.3.96/27 for the private subnet. Next, we define the default database name, username and a temporary password to use when setting up the WordPress database.
AWSTemplateFormatVersion: "2010-09-09"
Parameters:
  VpcCidrBlock:
    Type: String
    Description: CIDR block for the VPC
    Default: "10.0.3.64/26"
  PublicSubnetCidrBlock:
    Type: String
    Description: CIDR block for the public subnet
    Default: "10.0.3.64/27"
  PrivateSubnetCidrBlock:
    Type: String
    Description: CIDR block for the private subnet
    Default: "10.0.3.96/27"
  DatabaseName:
    Type: String
    Description: Name of the database
    Default: "wordpress"
  DatabaseUser:
    Type: String
    Description: Name of the database user
    Default: "wordpress-admin"
  DatabasePassword:
    Type: String
    Description: Initial Temporary password for the database user
    NoEcho: true
Resources
In the next section, we’ll define the resources that will make up our stack. Let’s start with the VPC and Subnets:
VPC and Subnets
Resources:
  WordPressVPC:
    Type: "AWS::EC2::VPC"
    Properties:
      CidrBlock: !Ref VpcCidrBlock
      EnableDnsSupport: true
      EnableDnsHostnames: true
      Tags:
        - Key: "Name"
          Value: "WordPressVPC"

  PublicSubnet:
    Type: "AWS::EC2::Subnet"
    Properties:
      VpcId: !Ref WordPressVPC
      CidrBlock: !Ref PublicSubnetCidrBlock
      MapPublicIpOnLaunch: true
      AvailabilityZone: !Select [0, !GetAZs ""]
      Tags:
        - Key: "Name"
          Value: "PublicSubnet"

  PrivateSubnet:
    Type: "AWS::EC2::Subnet"
    Properties:
      VpcId: !Ref WordPressVPC
      CidrBlock: !Ref PrivateSubnetCidrBlock
      AvailabilityZone: !Select [1, !GetAZs ""]
      Tags:
        - Key: "Name"
          Value: "PrivateSubnet"
We define a VPC called WordPressVPC , assign it a CIDR and enable DNSSupport and DNS Hostnames in it. We use the !Ref notation to refer to the values in the parameters we created in the previous step. Next, we define the two subnets in two different availability zones within the same region. We configure the public subnet to automatically assign public IP addresses to instances launched in it. This will be useful to the WordPress instance once it’s up and running. We don’t enable a public IP address for the private subnet because we want to limit access to it and lock it down so nothing except for the WordPress server can access it.
Gateways
Next, we add gateways to control network access:
InternetGateway:
    Type: AWS::EC2::InternetGateway
    Properties:
      Tags:
        - Key: "Name"
          Value: "InternetGateway"

  AttachGateway:
    Type: AWS::EC2::VPCGatewayAttachment
    Properties:
      VpcId: !Ref WordPressVPC
      InternetGatewayId: !Ref InternetGateway

  NATGatewayEIP:
    Type: AWS::EC2::EIP
    Properties:
      Domain: vpc
      Tags:
        - Key: Name
          Value: NATGatewayEIP

  NatGateway:
    Type: AWS::EC2::NatGateway
    Properties:
      AllocationId: !GetAtt NATGatewayEIP.AllocationId
      SubnetId: !Ref PublicSubnet
Here, we first define an Internet Gateway and then attach it to the VPC. An Internet Gateway acts as a bridge between your virtual network and the Internet. It allows EC2 instances in the VPC to access the Internet and also be accessed from the Internet. The next set of resources we define are an Elastic IP and a NAT Gateway. An Elastic IP is a static public IP address we’ll assign to the NAT Gateway. The NAT Gateway is an AWS service that allows instances in the private subnet to access the internet to download and install updates while restricting external connections to those instances. We’ll need this for the Database instance. The NAT Gateway needs to have a static public IP address to work.
Routes
To make the networking work as we expect, we need to set up route tables and routes. A route table is a set of rules or “routes” that controls how traffic flows within the VPC. We want to make it so that we forward all external, Internet-bound traffic through the Internet Gateway and all outbound traffic from the private subnet through the NAT Gateway.
  NatGateway:
    Type: AWS::EC2::NatGateway
    Properties:
      AllocationId: !GetAtt NATGatewayEIP.AllocationId
      SubnetId: !Ref PublicSubnet

  NatGatewayRoute:
    Type: AWS::EC2::Route
    Properties:
      RouteTableId: !Ref PrivateRouteTable
      DestinationCidrBlock: 0.0.0.0/0
      NatGatewayId: !Ref NatGateway

  PrivateRouteTable:
    Type: AWS::EC2::RouteTable
    Properties:
      VpcId: !Ref WordPressVPC
      Tags:
        - Key: Name
          Value: PrivateRouteTable

  PrivateSubnetRouteTableAssociation:
    Type: AWS::EC2::SubnetRouteTableAssociation
    Properties:
      SubnetId: !Ref PrivateSubnet
      RouteTableId: !Ref PrivateRouteTable

  PublicRouteTable:
    Type: AWS::EC2::RouteTable
    Properties:
      VpcId: !Ref WordPressVPC
      Tags:
        - Key: Name
          Value: RouteTable

  PublicRoute:
    Type: AWS::EC2::Route
    DependsOn: AttachGateway
    Properties:
      RouteTableId: !Ref PublicRouteTable
      DestinationCidrBlock: 0.0.0.0/0
      GatewayId: !Ref InternetGateway

  SubnetRouteTableAssociation:
    Type: AWS::EC2::SubnetRouteTableAssociation
    Properties:
      SubnetId: !Ref PublicSubnet
      RouteTableId: !Ref PublicRouteTable
Here, we define the NAT Gateway, and place it in the public subnet. Its job is to allow Internet access to EC2 instances in the private subnet. The NAT Gateway must be placed in the public subnet so it has direct Internet access which it needs in order to function. Next, we define routes for the private and public subnets. As I mentioned before, the private subnet route directs traffic meant for the Internet through the NAT Gateway and the public subnet route directs all external traffic through the Internet Gateway.
Security
Our infrastructure is taking shape. We are almost ready to add servers, but before we do, let’s secure our network. The WordPress server must be accessible over the Internet on port 80 for HTTP and 443 for HTTPS. We might want to SSH into it for maintenance purposes so we’ll enable SSH access too. We want to lock down the Database server to only allow communication between it and the WordPress server (or servers if we choose to have more than one for scalability) over the MySQL port 3306.
Adding a bastion or jump server to provide an entry point into this network for extra security and easier server administration is a good idea but I won't discuss it in this post.
  AppServerInstanceSecurityGroup:
    Type: AWS::EC2::SecurityGroup
    Properties:
      GroupDescription: "Enable HTTP, HTTPS and SSH access via port 80, 443 and 22"
      VpcId: !Ref WordPressVPC
      SecurityGroupIngress:
        - IpProtocol: tcp
          FromPort: 80
          ToPort: 80
          CidrIp: 0.0.0.0/0
        - IpProtocol: tcp
          FromPort: 443
          ToPort: 443
          CidrIp: 0.0.0.0/0
        - IpProtocol: tcp
          FromPort: 22
          ToPort: 22
          CidrIp: 0.0.0.0/0

  DatabaseServerInstanceSecurityGroup:
    Type: AWS::EC2::SecurityGroup
    Properties:
      GroupDescription: "Enable MySQL access via port 3306"
      VpcId: !Ref WordPressVPC
      SecurityGroupIngress:
        - IpProtocol: tcp
          FromPort: 3306
          ToPort: 3306
          SourceSecurityGroupId: !GetAtt AppServerInstanceSecurityGroup.GroupId
Here, we add two security groups, one for the WordPress Application servers and another for the Database Server(s). The AppServerInstanceSecurityGroup allows HTTP, HTTPS and SSH traffic from the Internet. To improve the security of your network, you’ll probably want to limit the IP addresses that can SSH into this instance in production and change the default port, but for the purposes of this tutorial and keeping things simple, we’ll leave the configuration as it is. The DatabaseServerInstanceSecurityGroup limits incoming connections to connections on the MySQL port 3306 and explicitly only allows connections from the WordPress Instance.
Servers
Let’s create the servers that will run our applications. We need two server instances, one for WordPress which we’ll place in the public subnet and a second one for MariaDB/MySQL in the private subnet.
DatabaseServerInstance:
    Type: AWS::EC2::Instance
    Properties:
      Tags:
        - Key: Name
          Value: DatabaseServerInstance
      ImageId: ami-0fef2f5dd8d0917e8 # Amazon Linux 2023 AMI
      InstanceType: t2.micro
      NetworkInterfaces:
        - AssociatePublicIpAddress: false
          DeviceIndex: 0
          SubnetId: !Ref PrivateSubnet
          GroupSet:
            - !GetAtt DatabaseServerInstanceSecurityGroup.GroupId
      UserData:
        Fn::Base64: !Sub
          - |
            #!/bin/bash
            yum update -y
            yum install mariadb105-server -y
            systemctl start mariadb
            systemctl enable mariadb
            mysql -u root -e "CREATE DATABASE ${database_name}; CREATE USER '${database_user}'@'%' IDENTIFIED BY '${database_password}'; GRANT ALL PRIVILEGES ON ${database_name}.* TO '${database_user}'@'%'; FLUSH PRIVILEGES;"
          - database_name: !Ref DatabaseName
            database_user: !Ref DatabaseUser
            database_password: !Ref DatabasePassword

  WordPressInstance:
    Type: AWS::EC2::Instance
    DependsOn: DatabaseServerInstance
    Properties:
      Tags:
        - Key: Name
          Value: WordPressInstance
      ImageId: ami-0fef2f5dd8d0917e8 # Amazon Linux 2023 AMI
      InstanceType: t2.micro
      KeyName: wordpress_key
      NetworkInterfaces:
        - AssociatePublicIpAddress: true
          DeviceIndex: 0
          SubnetId: !Ref PublicSubnet
          GroupSet:
            - !GetAtt AppServerInstanceSecurityGroup.GroupId
      UserData:
        Fn::Base64: !Sub
          - |
            #!/bin/bash
            yum update -y
            yum install -y httpd
            systemctl start httpd
            systemctl enable httpd
            yum install -y php php-mysqlnd php-gd php-fpm php-mysqli php-json php-devel
            cd /var/www/html
            curl -O https://wordpress.org/latest.tar.gz
            tar -zxvf latest.tar.gz
            mv wordpress/* .
            rm -rf wordpress latest.tar.gz
            chown -R apache:apache /var/www/html
            chmod -R 755 /var/www/html
            cp wp-config-sample.php wp-config.php

            sed -i "s/database_name_here/${database_name}/" wp-config.php
            sed -i "s/username_here/${database_user}/" wp-config.php
            sed -i "s/password_here/${database_password}/" wp-config.php
            sed -i "s/localhost/${database_host}/" wp-config.php
            systemctl restart httpd

          - database_host: !GetAtt DatabaseServerInstance.PrivateIp
            database_name: !Ref DatabaseName
            database_user: !Ref DatabaseUser
            database_password: !Ref DatabasePassword
Here, we define two EC2 instances based on the Amazon Linux 2023 image. The first configuration defines how the database server should be set up. Its configuration adds the DatabaseServerInstance into the DatabaseServerInstanceSecurityGroup we created earlier. When this instance is created, the script defined in the UserData section will install MariaDB, a drop in replacement for MySQL and then setup a WordPress database and an admin user. Scripts defined in UserData run the first time an instance is launched.
To improve the security of this deployment, I recommend creating a root password, securing the database server and changing the database password and managing it using a secure vault or secrets manager like AWS Secrets Manager.
The WordPressInstance has a similar configuration to the Database Instance with the exception that instead of installing a database server, we set it up with PHP, dependencies we need to run web applications and WordPress. The instance has the AppServerInstanceGroup security group applied to it which allows it to be accessed from the Internet. This instance will be accessible via SSH using the wordpress_key SSH KeyPair. I chose an arbitrary name here but if you want to use a specific SSH key pair with an instance, you’ll have to create it before running this CloudFormation script and adding the public key to EC2. The WordPress instance gets a public IP address and its user data script installs WordPress and configures it to connect to the database server instance.
Outputs
The last step in setting up our environment is to produce outputs. CloudFormation allows you to export values from one template into another. So, If we ever want to use this template as part of a bigger stack, we can make it produce an output such as the public IP address of the WordPress instance.
Outputs:
  PublicIPAddress:
    Description: Public IP address of the WordPress Instance
    Value: !GetAtt WordPressInstance.PublicIp
This output will display the WordPress instance’s public IP after the CloudFormation stack is created.
Create the Stack
Our completed template now looks like this. I’ll save it as create_environment.yaml.
AWSTemplateFormatVersion: "2010-09-09"
Parameters:
  VpcCidrBlock:
    Type: String
    Description: CIDR block for the VPC
    Default: "10.0.3.64/26"
  PublicSubnetCidrBlock:
    Type: String
    Description: CIDR block for the public subnet
    Default: "10.0.3.64/27"
  PrivateSubnetCidrBlock:
    Type: String
    Description: CIDR block for the private subnet
    Default: "10.0.3.96/27"
  DatabaseName:
    Type: String
    Description: Name of the database
    Default: "wordpress"
  DatabaseUser:
    Type: String
    Description: Name of the database user
    Default: "wordpress-admin"
  DatabasePassword:
    Type: String
    Description: Initial Temporary password for the database user
    NoEcho: true

Resources:
  WordPressVPC:
    Type: "AWS::EC2::VPC"
    Properties:
      CidrBlock: !Ref VpcCidrBlock
      EnableDnsSupport: true
      EnableDnsHostnames: true
      Tags:
        - Key: "Name"
          Value: "WordPressVPC"

  PublicSubnet:
    Type: "AWS::EC2::Subnet"
    Properties:
      VpcId: !Ref WordPressVPC
      CidrBlock: !Ref PublicSubnetCidrBlock
      MapPublicIpOnLaunch: true
      AvailabilityZone: !Select [0, !GetAZs ""]
      Tags:
        - Key: "Name"
          Value: "PublicSubnet"

  PrivateSubnet:
    Type: "AWS::EC2::Subnet"
    Properties:
      VpcId: !Ref WordPressVPC
      CidrBlock: !Ref PrivateSubnetCidrBlock
      AvailabilityZone: !Select [1, !GetAZs ""]
      Tags:
        - Key: "Name"
          Value: "PrivateSubnet"

  InternetGateway:
    Type: AWS::EC2::InternetGateway
    Properties:
      Tags:
        - Key: "Name"
          Value: "InternetGateway"

  AttachGateway:
    Type: AWS::EC2::VPCGatewayAttachment
    Properties:
      VpcId: !Ref WordPressVPC
      InternetGatewayId: !Ref InternetGateway

  NATGatewayEIP:
    Type: AWS::EC2::EIP
    Properties:
      Domain: vpc
      Tags:
        - Key: Name
          Value: NATGatewayEIP

  NatGateway:
    Type: AWS::EC2::NatGateway
    Properties:
      AllocationId: !GetAtt NATGatewayEIP.AllocationId
      SubnetId: !Ref PublicSubnet

  PrivateRouteTable:
    Type: AWS::EC2::RouteTable
    Properties:
      VpcId: !Ref WordPressVPC
      Tags:
        - Key: Name
          Value: PrivateRouteTable

  NatGatewayRoute:
    Type: AWS::EC2::Route
    Properties:
      RouteTableId: !Ref PrivateRouteTable
      DestinationCidrBlock: 0.0.0.0/0
      NatGatewayId: !Ref NatGateway

  PrivateSubnetRouteTableAssociation:
    Type: AWS::EC2::SubnetRouteTableAssociation
    Properties:
      SubnetId: !Ref PrivateSubnet
      RouteTableId: !Ref PrivateRouteTable

  PublicRouteTable:
    Type: AWS::EC2::RouteTable
    Properties:
      VpcId: !Ref WordPressVPC
      Tags:
        - Key: Name
          Value: RouteTable

  PublicRoute:
    Type: AWS::EC2::Route
    DependsOn: AttachGateway
    Properties:
      RouteTableId: !Ref PublicRouteTable
      DestinationCidrBlock: 0.0.0.0/0
      GatewayId: !Ref InternetGateway

  SubnetRouteTableAssociation:
    Type: AWS::EC2::SubnetRouteTableAssociation
    Properties:
      SubnetId: !Ref PublicSubnet
      RouteTableId: !Ref PublicRouteTable

  AppServerInstanceSecurityGroup:
    Type: AWS::EC2::SecurityGroup
    Properties:
      GroupDescription: "Enable HTTP, HTTPS and SSH access via port 80, 443 and 22"
      VpcId: !Ref WordPressVPC
      SecurityGroupIngress:
        - IpProtocol: tcp
          FromPort: 80
          ToPort: 80
          CidrIp: 0.0.0.0/0
        - IpProtocol: tcp
          FromPort: 443
          ToPort: 443
          CidrIp: 0.0.0.0/0
        - IpProtocol: tcp
          FromPort: 22
          ToPort: 22
          CidrIp: 0.0.0.0/0

  DatabaseServerInstanceSecurityGroup:
    Type: AWS::EC2::SecurityGroup
    Properties:
      GroupDescription: "Enable MySQL access via port 3306"
      VpcId: !Ref WordPressVPC
      SecurityGroupIngress:
        - IpProtocol: tcp
          FromPort: 3306
          ToPort: 3306
          SourceSecurityGroupId: !GetAtt AppServerInstanceSecurityGroup.GroupId

  DatabaseServerInstance:
    Type: AWS::EC2::Instance
    Properties:
      Tags:
        - Key: Name
          Value: DatabaseServerInstance
      ImageId: ami-0fef2f5dd8d0917e8 # Amazon Linux 2023 AMI
      InstanceType: t2.micro
      NetworkInterfaces:
        - AssociatePublicIpAddress: false
          DeviceIndex: 0
          SubnetId: !Ref PrivateSubnet
          GroupSet:
            - !GetAtt DatabaseServerInstanceSecurityGroup.GroupId
      UserData:
        Fn::Base64: !Sub
          - |
            #!/bin/bash
            yum update -y
            yum install mariadb105-server -y
            systemctl start mariadb
            systemctl enable mariadb
            mysql -u root -e "CREATE DATABASE ${database_name}; CREATE USER '${database_user}'@'%' IDENTIFIED BY '${database_password}'; GRANT ALL PRIVILEGES ON ${database_name}.* TO '${database_user}'@'%'; FLUSH PRIVILEGES;"
          - database_name: !Ref DatabaseName
            database_user: !Ref DatabaseUser
            database_password: !Ref DatabasePassword

  WordPressInstance:
    Type: AWS::EC2::Instance
    DependsOn: DatabaseServerInstance
    Properties:
      Tags:
        - Key: Name
          Value: WordPressInstance
      ImageId: ami-0fef2f5dd8d0917e8 # Amazon Linux 2023 AMI
      InstanceType: t2.micro
      KeyName: wordpress_key
      NetworkInterfaces:
        - AssociatePublicIpAddress: true
          DeviceIndex: 0
          SubnetId: !Ref PublicSubnet
          GroupSet:
            - !GetAtt AppServerInstanceSecurityGroup.GroupId
      UserData:
        Fn::Base64: !Sub
          - |
            #!/bin/bash
            yum update -y
            yum install -y httpd
            systemctl start httpd
            systemctl enable httpd
            yum install -y php php-mysqlnd php-gd php-fpm php-mysqli php-json php-devel
            cd /var/www/html
            curl -O https://wordpress.org/latest.tar.gz
            tar -zxvf latest.tar.gz
            mv wordpress/* .
            rm -rf wordpress latest.tar.gz
            chown -R apache:apache /var/www/html
            chmod -R 755 /var/www/html
            cp wp-config-sample.php wp-config.php

            sed -i "s/database_name_here/${database_name}/" wp-config.php
            sed -i "s/username_here/${database_user}/" wp-config.php
            sed -i "s/password_here/${database_password}/" wp-config.php
            sed -i "s/localhost/${database_host}/" wp-config.php
            systemctl restart httpd

          - database_host: !GetAtt DatabaseServerInstance.PrivateIp
            database_name: !Ref DatabaseName
            database_user: !Ref DatabaseUser
            database_password: !Ref DatabasePassword

Outputs:
  PublicIPAddress:
    Description: Public IP address of the WordPress Instance
    Value: !GetAtt WordPressInstance.PublicIp
You can use the AWS CLI or the Console to create this stack, which I have decided to call the WordPressStack. To do it in the CLI run these commands:
# First, check that the template syntax is valid
aws cloudformation validate-template --template-body file://create_environment.yaml

# Create the stack in AWS
aws cloudformation create-stack --stack-name WordPressStack --template-body file://create_environment.yaml
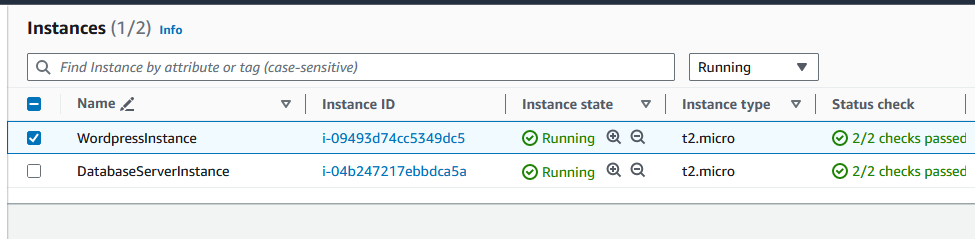
If the stack creation was successful, you should now see the resources that got created in your AWS account. Under EC2, there should be two new running instances:
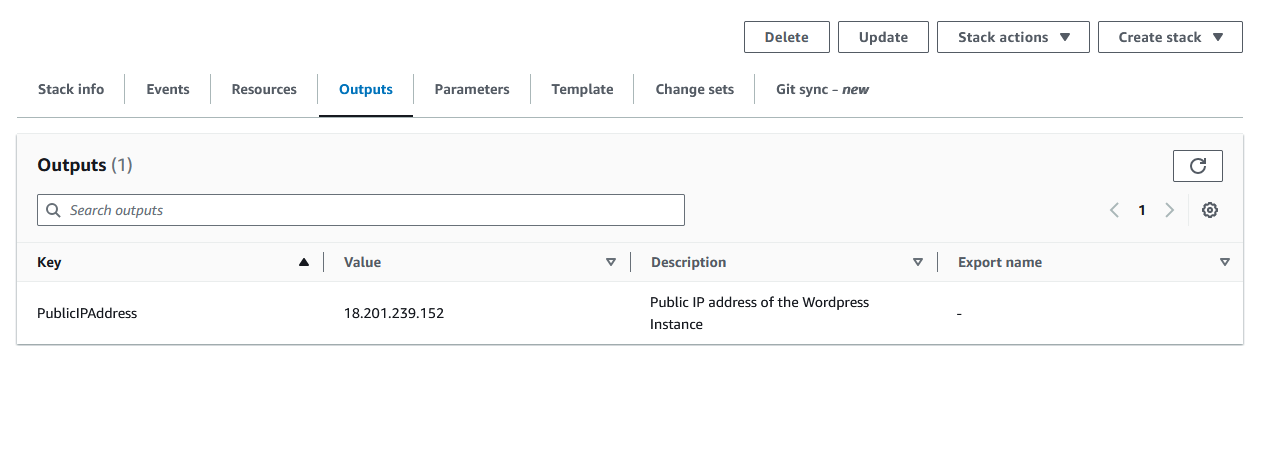
In the CloudFormation section of the console, we can see the output from our stack creation; the public IP address of the WordPress instance.
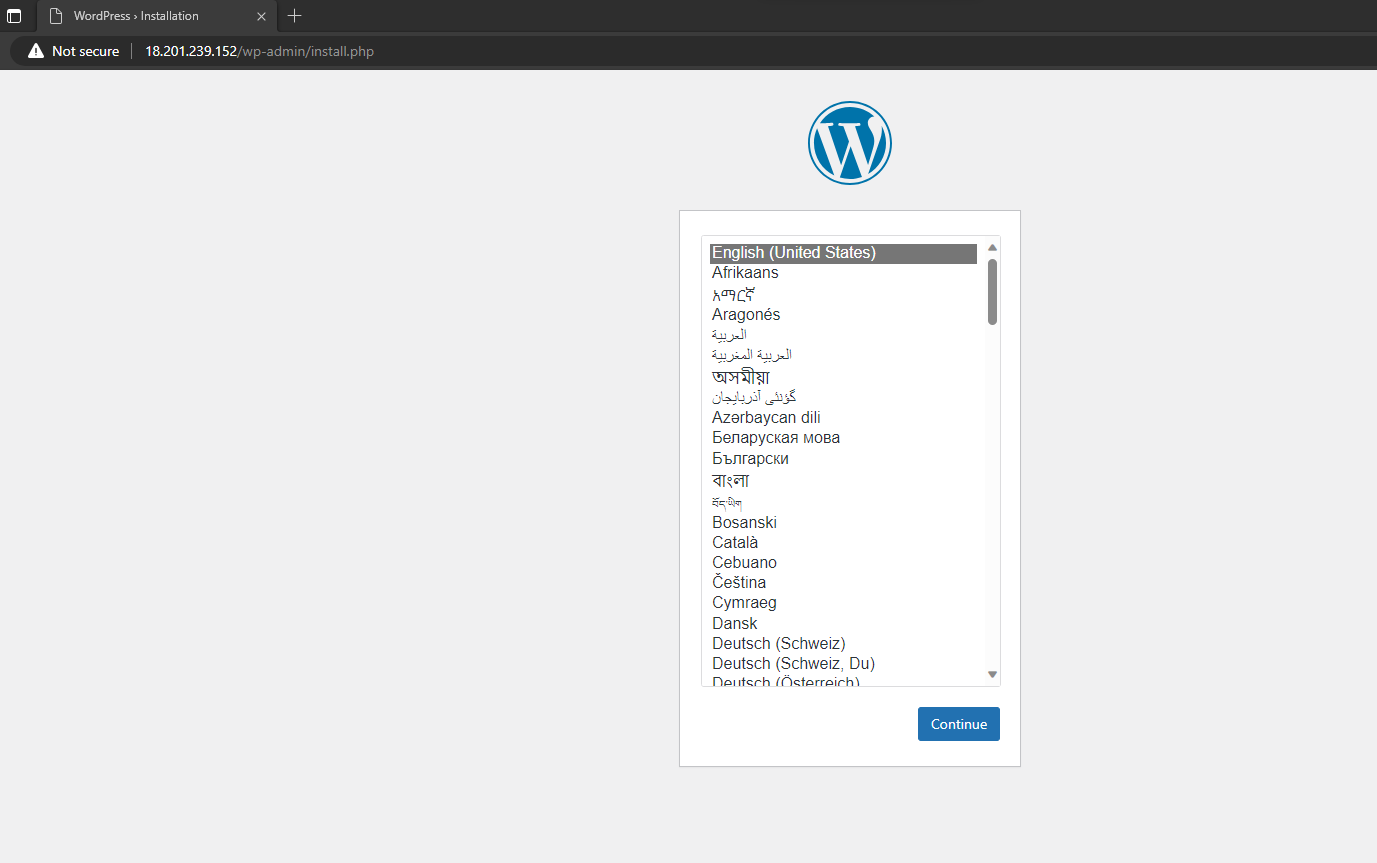
Navigate to that IP address in the browser via HTTP. HTTPS won’t work because we didn’t set it up. In my case, the WordPress IP is 18.201.239.152 so If I navigate to http://18.201.239.152 in the browser and I get the WordPress installation menu:
Once you go through the installation wizard and log in, you’ll see the WordPress Dashboard:
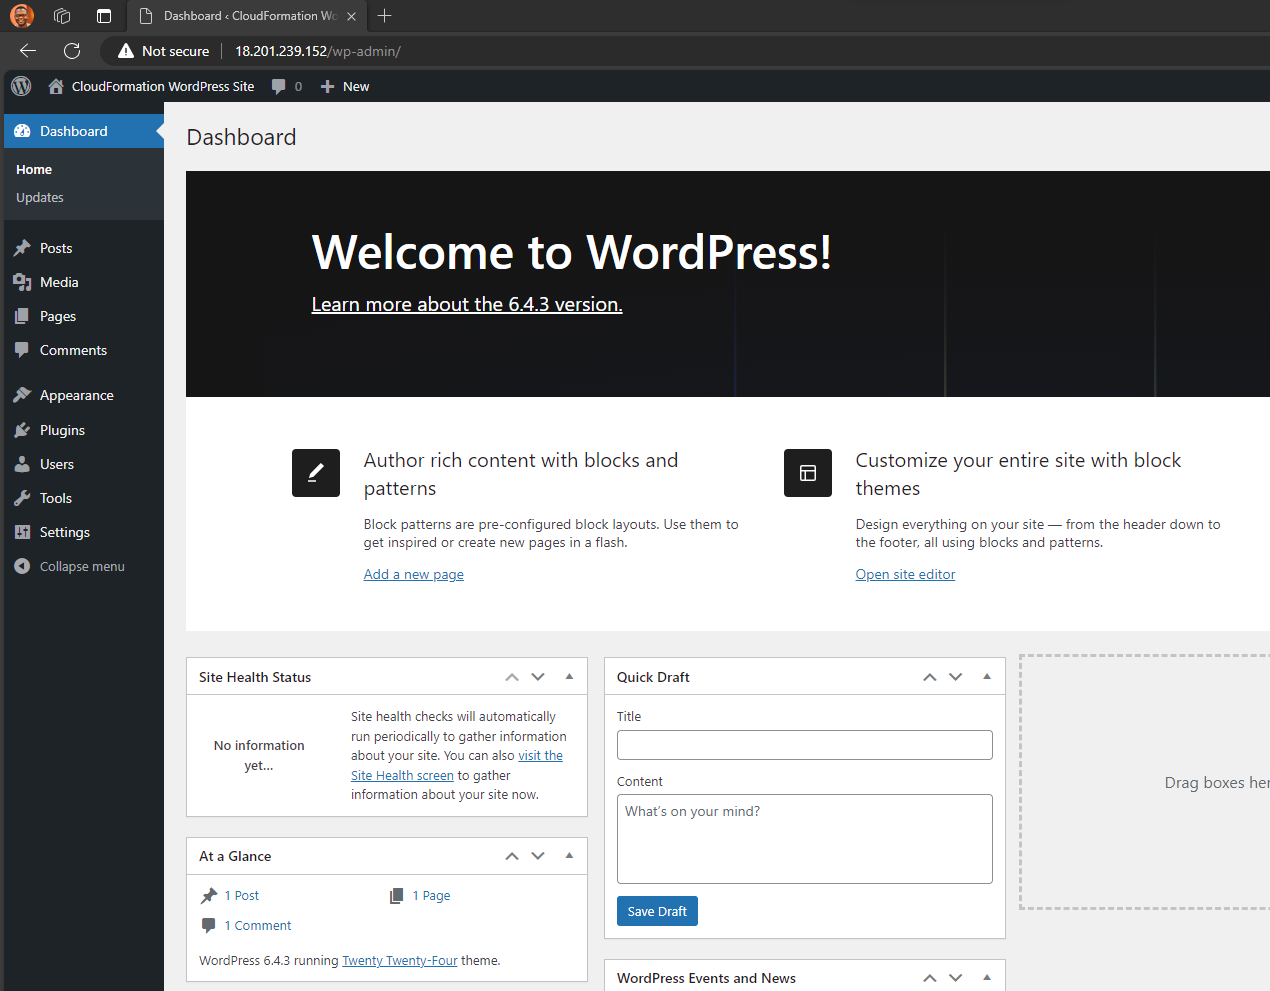
Your WordPress site is up and running!
Conclusion and Extra reading
This post showed you how to create a two tier WordPress architecture using CloudFormation. You saw how to create CloudFormation templates in YAML to define resources in AWS such as EC2 instances, Internet Gateways, virtual networks, subnets, routes and how to run custom scripts in EC2 instances. The post also covered how to use the AWS CLI to validate and deploy infrastructure defined in CloudFormation templates to create a WordPress application with a MariaDB database.
To complete the WordPress setup, you could consider adding a domain, an SSL/TLS certificate to it and using a CDN to handle static files.