One of the projects I’m working on for work is hosted on Amazon’s Elastic Beanstalk. A problem cropped up recently that blocked the dev team’s ability to use the API I’m building. One of the business requirements is that all requests and responses to the API should be over HTTPS, which is something we will setup in production. So for development and testing purposes, I decided to create a self signed certificate. This post documents how to do that.
HTTPS is a secure protocol that allows browsers to send encrypted information to a server and vice versa. For HTTPS to work, websites need to have an SSL certificate. This is a document that verifies that the browser is talking to the actual domain owner and not a fake domain. SSL also handles encryption of traffic between your browser and the server it is communicating with.
Normally, if you want an SSL certificate, you buy it from companies like Thawte or Verisign. These organisations generate the certificate for you and digitally sign it. When your browser sees that an SSL certificate on a website has been signed by one of these Certificate Authorities, it immediately trusts the website and shows you a green lock icon whenever you visit the website.
In my case, I only needed a temporary certificate to test the API I’m building. To make your own SSL certificate, you can use OpenSSL. Once you have OpenSSL installed, there are three steps to generating the certificate:
- Generating a private key
- Using the private key to create a Certificate Signing Request and
- Signing the certificate yourself
Generating the private key
openssl genrsa 2048 > privatekey.pem
This generates a 2048 bit RSA Private Key with strong encryption. and stores it in a file called privatekey.pem. This privatekey contains cryptographic information that will be used to encrypt and decrypt information sent between your server and the users.
Making a Certificate Signing Request
openssl req -new -key privatekey.pem -out csr.pem
Run the command above in your terminal. This generates a signing request file. In this step, you’ll be required to enter information about the website and your company. The private key you made in the previous step will be used to identify and verify the domain you specify here. Since we’re doing this for amazon, when prompted to enter a common name for your domain, enter the domain of your Elastic Beanstalk instance. It should be in this format: your-environment.us-east-2.elasticbeanstalk.com.
Sign the Certificate
If you were creating a real certificate for a production site, you would want to have your SSL certificate signed by a Certificate Authority at this point. Since this is for test purposes you can sign the certificate yourself by running the following command:
openssl x509 -req -days 365 -in csr.pem -signkey privatekey.pem -out server.crt
The x509 command is used to sign the certificate. X509 is a standard format of public key certificates, which is what we are creating here. A public key certificate is a digital document that associates cryptographic data with websites. The steps you took in creating the Certificate Signing Request created this cryptographic information.
In the command above, you specify how long the certificate should be valid for, the filename containing the certificate signing request, the key that will be used to sign the certificate and finally the filename of the resulting signed certificate. Now that you have the certificate, you can upload it to Amazon for use with Elastic Beanstalk.
To upload your certificate, navigate to your Amazon dashboard and go to the Certificate Manager. Once there, click on “Import Certificate”. you should see a screen that looks like the one below:
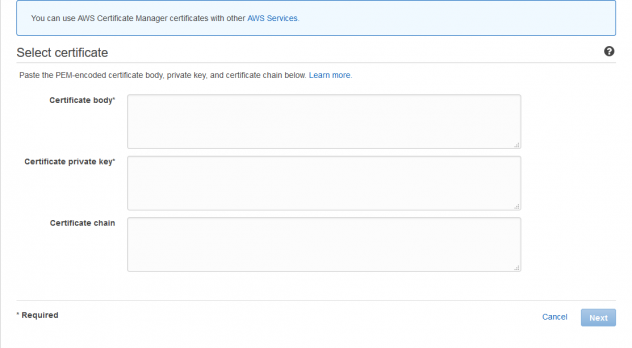
Open server.crt and privatekey.pem in a text editor and copy the contents of server.crt into the certificate body field. Copy the contents of privatekey.pem file into the certificate private key field. Click Next and review everything you have done up to this point.
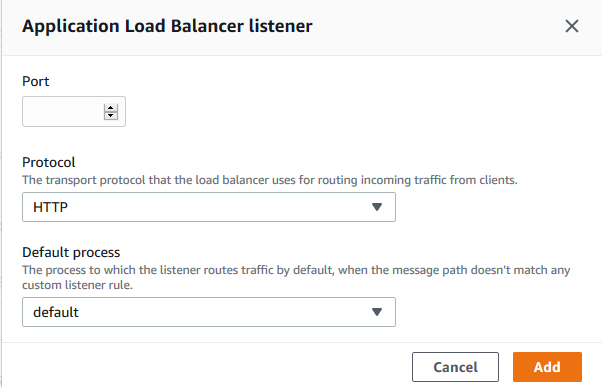
The next thing to do is to specify the web server environment where you would like to have the certificate installed. Navigate to your Elastic Beanstalk environment and select the “Configuration” link. Click Edit next to “Load balancer” and add a new listener and enter 443 in the port field. Set the protocol to HTTPS and select the default process for your environment. Select the SSL certificate you uploaded in the step above from the drop down and complete the setup:
Your environment might restart at this point but your certificate should be installed. Since this is a self signed certificate, when you navigate to the website your browser will issue a warning about that that you can safely choose to ignore.