Intro
This post builds on the work I started in the last article where I turned our USB-only printer into a wireless printer. I recently figured out how to set the same printer/scanner to scan documents wirelessly. In this post, I’ll show you how to do it using the SANE utility. SANE stands for Scanner Access Now Easy.
Install SANE
# install
sudo apt-get install sane-utils
Configure the SANE daemon
Find and edit the SANE configuration file:
# Edit the configuration file
sudo nano /etc/sane.d/saned.conf
In it, add the IP addresses of the computers that should be allowed to scan over the network. Look for a section that looks like this and add the IP addresses or address ranges here:
## Access list
# A list of host names, IP addresses or IP subnets (CIDR notation) that
# are permitted to use local SANE devices. IPv6 addresses must be enclosed
# in brackets, and should always be specified in their compressed form.
#
# The hostname matching is not case-sensitive.

#scan-client.somedomain.firm
#192.168.0.1
Make sure to remove the # in front of the IP address you want to add.
Restart the Daemon
sudo systemctl restart saned.socket
Test the setup
Run the following commands to find and list scanners connected to your computer
# Find scanners
sane-find-scanner

# List scanners
scanimage -L
Use
Do this to run the command on the Pi and save the result locally
ssh user@pi scanimage > image.jpg --format jpeg
Scan over network
To scan over the network, install a frontend to SANE like scanservjs
Install it
The command below runs the install script that downloads a .deb file and installs it with apt
curl -s https://raw.githubusercontent.com/sbs20/scanservjs/master/bootstrap.sh | sudo bash -s -- -v latest
To uninstall
sudo apt-get remove scanservjs
Configure reverse proxy
Make the scanservjs server accessible in your local network by placing it behind a reverse proxy. Here’s an example using Nginx. Create a new virtual host in /etc/nginx/sites-available/scanservjs. Replace scanner.vuyisile.lan with your own domain
server {
    # increase timeouts since scan operations can take some time
    server_name scanner.vuyisile.lan;
    proxy_read_timeout 300;
    proxy_connect_timeout 300;
    proxy_send_timeout 300;

    location /scanner/ {
        proxy_set_header X-Real-IP $remote_addr;
        proxy_pass                 http://127.0.0.1:8080/;
    }
}
Enable it
sudo ln -s /etc/nginx/sites-available/scanservjs /etc/nginx/sites-enabled/
Scan
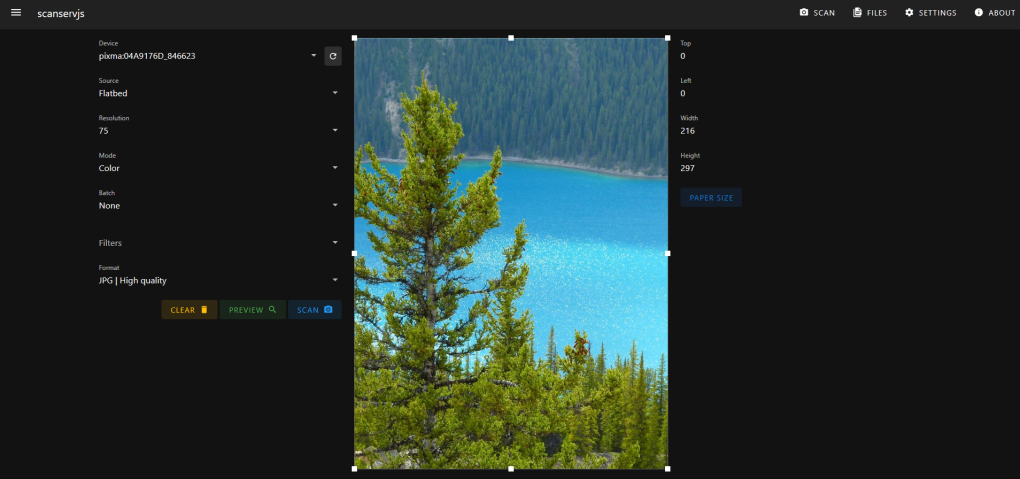
In your browser, go to http://scanner.vuyisile.lan (replace with the domain you chose) to scan. You’ll see a UI like the one in the picture below.