GTK+ stands for GIMP Toolkit. It is a framework or set of tools used to develop applications with Graphical User Interfaces. GTK+ is available in the major Operating Systems, namely Windows, Linux and Mac. GTK+ is free software licensed under a GNU LGPL 2.1 license which basically means that anyone is free to use the toolkit for their projects, including commercial and proprietary software without having to pay any license fees.
Installation
The first step to building applications using GTK+ is to install it and other dependencies needed to build applications using Python like pygobject. Most Linux distributions have GTK+ installed by default. This page here has instructions on how to install GTK+ in different operating systems.
Installing GTK+ on Windows
The latest version of GTK+ Requires Windows Vista or later. There are two ways of installing GTK+ and its dependencies on Windows. The easiest method is to download an executable file that installs all the pygobject dependencies from sourcefourge. The disadvantage of using this approach is that the installer only works for Python versions up to 3.4.
The alternative method to getting GTK+ to work on Windows is to installing using MSYS2, a program that provides a UNIX-like development environment for Windows. MSYS2 provides packages for many software applications and libraries, including GTK+. In UNIX-like systems, programs are installed using package managers. Package managers are command line utilities that allow you to download, install and remove software from the system MSYS2 uses the pacman package manager.
Getting Started
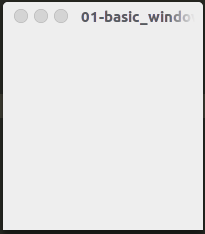
To get started with GUI programming, we first create the most basic GUI widget that will contain everything else; the window. A widget is any control that the user can interact with, such as buttons, windows and scrollbars. The code below creates a simple 200px * 200px window.
import gi
gi.require_version('Gtk', '3.0')
from gi.repository import Gtk

window = Gtk.Window()
window.connect("delete-event", Gtk.main_quit)
window.show_all() # displays the window to the user
Gtk.main() # Start the program's main loop
The first two lines tell Python to import Gtk and also to use the latest version, which at the time of this writing is version 3. The next line creates an empty window.
window = Gtk.Window()
The next line connects to the Window’s “delete-event” signal. This line is responsible for closing the window when the “x” or close button on the window is pressed. I will explain signals in a bit.
To make the program more useful, let’s re-write the program in an Object Oriented way and add a button to it that will call a function when clicked.
import gi
gi.require_version('Gtk', '3.0')
from gi.repository import Gtk

class MainWindow(Gtk.Window) # inherits from gtk.window

    def __init__(self):
        Gtk.Window.__init__(self, title = "Hello World")


    self.button = Gtk.Button(label = "Click Here")
    self.button.connect("clicked", self.button_clicked)
    self.add(button)


    def button_clicked(self, widget):
        print("Hello world!")

window = MainWindow()
window.connect("delete-event", Gtk.main_quit)
window.show_all()
Gtk.main()

GTK+ only takes up as much space as the widgets contained in the window require, which is why the window above is so small. The size of the window will adjust as more elements are added to it.
Subclassing (inheriting from gtk.window) allows us to add our own features to the standard GTK+ window and create as many copies of the window as we like. In the code above, we created an __init__() method and called the __init__() method of the parent class. We do this to set the title of the window:
    def __init__(self):
            Gtk.Window.__init__(self, title = "Hello World")
After setting the title of MainWindow(), we create a button. Buttons are created like this:
button = Gtk.Button(label = "Click Here")
The code above makes an instance of the Gtk.Button class. To display text on the button, pass a label value to the button. The next line of code connects to the button’s “clicked” signal and calls a function. I explain what signals are in the next section.
Signals
Signals are GTK’s notification mechanism. Whenever an element like a button or widget is interacted with, it emits a signal. The signal means that the element or widget did something or something happened to it. Buttons for example have can emit “clicked” and “released” signals when they are clicked on and un-clicked.
Functions connected to signals are usually referred to as callbacks. When a user has not done anything, Gtk sits and waits for the user’s input in what is called the “main loop”. When a signal is emitted, the main loop delivers the event to Gtk.
The code below connects the clicked signal to the self.button_clicked() function. This means that whenever the button is clicked on, the self.button_clicked() function is called.
button.connect("clicked", self.button_clicked)


def button_clicked(self, widget):
    print("Hello world!")
After creating the button and connecting to its clicked signal, we add it to the window:
self.add(self.button)
The last code block that is outside the class creates a new instance of MyWindow()
There you have it, you have made a GUI application using Python and GTK+